Setting Up Hosting (cPanel, SSL, Email Accounts)
Module: Website Setup & WordPress Basics • Lesson: Setting Up Hosting
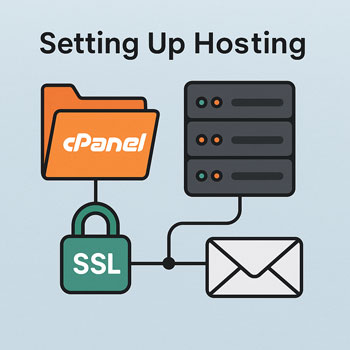
This lesson walks you through accessing cPanel, enabling SSL, creating email accounts, and preparing your hosting environment for a WordPress installation.
What Is cPanel?
cPanel is a web-based control panel used by many hosting providers to manage your website’s server environment. It provides tools to manage files, databases, domains, email, security, and more—all through a visual interface.
- User-friendly: Makes server tasks easier for beginners.
- Centralized management: Everything from domains to backups is in one location.
- Widely supported: Most tutorials and hosts use cPanel, making it easy to find help.
How to Access cPanel
There are three common ways to reach your cPanel dashboard:
- Via your hosting provider dashboard
- Log in → Select your hosting plan → Click “cPanel” or “Go to cPanel”.
- Direct link
- Visit:
yourdomain.com/cpaneloryourdomain.com:2083
- Visit:
- Email from host
- After signup, your provider sends login details including the cPanel URL, username, and password.
Quick Tour of Key cPanel Tools
Here are the most important sections you’ll use when setting up a new WordPress site:
1. File Manager
Browse and manage files on your server without FTP software.
2. Domains
- Add or manage addon domains
- Create subdomains (e.g., blog.yourdomain.com)
- Manage redirects
3. Databases
MySQL Database tools allow you to create databases required for WordPress.
4. Security Tools
- SSL/TLS manager
- ModSecurity
- IP blocker
5. Email
- Create email accounts like [email protected]
- Forwarders
- Webmail access
6. Software
- Softaculous or 1-click WordPress installer
- PHP version manager
How to Enable SSL (HTTPS)
An SSL certificate encrypts data between your site and visitors, enabling HTTPS and the padlock symbol in the browser.
Most hosts offer free SSL via Let’s Encrypt.
To enable SSL in cPanel:
- Open cPanel.
- Scroll to Security → click SSL/TLS Status.
- Find your domain and subdomains in the list.
- Check the box next to the domain(s) you want SSL on.
- Click Run AutoSSL.
SSL activation may take from a few minutes to 45 minutes depending on propagation.
How to Verify SSL Installation
Once SSL is enabled:
- Visit
https://yourdomain.com - Look for the padlock icon in the browser address bar.
- Use online tools:
If the padlock doesn’t appear:
- Your SSL may still be installing
- Your domain DNS may not be pointing to your host yet
- Your website may still contain mixed content (HTTP elements)
Creating Email Accounts in cPanel
Professional email accounts (e.g., [email protected]) strengthen branding and improve communication.
How to create an email account:
- In cPanel, go to Email → Email Accounts.
- Click Create.
- Select your domain.
- Enter the mailbox name (e.g., hello, support).
- Set a strong password.
- Choose storage limit (default is fine).
- Click Create.
Accessing your email
You can check email using:
- Webmail (found under Email Accounts → Check Email)
- Mobile apps (IMAP/SMTP settings provided in cPanel)
- Email clients like Outlook or Apple Mail
Activity: Enable SSL & Verify Secure Connection
Complete these steps to finish the lesson:
- Log into your cPanel account.
- Navigate to SSL/TLS Status.
- Run AutoSSL for your domain.
- Visit
https://yourdomain.comin your browser. - Take a screenshot showing the padlock icon.
- Upload your screenshot to the assignment area.
Optional: Also create your first domain email account.
Common cPanel Hosting Issues & Troubleshooting
- SSL not installing: DNS may not be pointing to the host yet.
- Email not sending: Outbound SMTP may be blocked; check cPanel’s email routing.
- Can’t reach cPanel: Your host may require login through their dashboard instead.
- Mixed content warnings: WordPress may be using old HTTP URLs—fixable after installation.