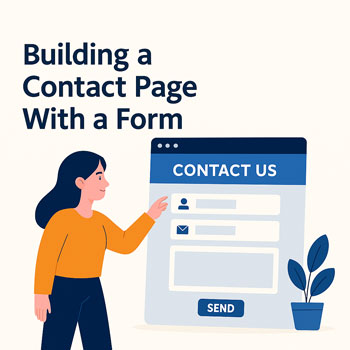
Building a Contact Page With a Form
Create a professional, accessible contact page in WordPress, complete with a working form, clear contact details, and trust elements that encourage inquiries.
Learning Objectives
- Plan the purpose and content of a high-converting contact page.
- Create and embed a contact form using a WordPress form plugin or block.
- Configure notifications, confirmations, spam protection, and basic GDPR compliance.
- Test, troubleshoot, and optimize accessibility and performance.
Prerequisites
- WordPress installed and logged into the Dashboard.
- A form solution installed (any reputable option works). Examples: “Contact Form” block, Fluent Forms, Gravity Forms, Ninja Forms, WPForms, Contact Form 7, etc.
- An email inbox you can receive notifications at (ideally on your domain).
What You’ll Build
A polished Contact page that includes a form, your key contact details, a map or service area (optional), hours, and FAQs—plus email notifications so you never miss a lead.
Step 1 — Plan Your Contact Page
Decide what visitors should do and what info you truly need.
- Goal: General inquiries, project quotes, support, or bookings?
- Fields: Name, Email, Phone (optional), Subject, Message, Consent checkbox.
- Response: Auto-reply “Thanks, we’ll get back to you in 1 business day.”
- Trust: Add social proof, hours, location, and alternate contact methods.
Step 2 — Create Your Form
- In the Dashboard, go to your form tool: Forms > Add New (or add a “Contact Form” block).
- Add fields:
- Name (Required)
- Email (Required, validated)
- Phone (Optional)
- Subject (Optional or dropdown)
- Message (Paragraph, Required)
- Consent (Required checkbox: “I agree to the privacy policy.”)
- Set the Submit Button label (e.g., “Send Message”).
Step 3 — Configure Notifications & Confirmations
- Admin Notification: Send to [email protected]. Subject like: New Website Inquiry — {Name}.
- User Auto-Reply (optional): “Thanks, we received your message and will reply within 1 business day.”
- Confirmation: Show a friendly on-page message or redirect to a “Thank You” page.
Deliverability Tips: Use domain email (not free webmail) and set up SPF/DKIM with your host for reliable delivery.
Step 4 — Add Spam Protection
- Enable your form’s honeypot and basic anti-spam features.
- Connect reCAPTCHA (v3 or v2) or a privacy-friendly alternative supported by your form plugin.
Step 5 — Build the Contact Page
- Go to Pages > Add New, title it Contact.
- Add a concise intro and expectations (response time).
Recommended Page Structure
- Headline: “Let’s Talk” or “Contact Our Team”
- Intro: One or two lines inviting messages + response time
- Form: Embedded below intro
- Alternate Contact: Email, phone, address, hours
- Map / Service Area: Optional but helpful for local businesses
- FAQ: Short list to reduce back-and-forth
- Embed the Form:
- Block Editor: Insert your form block and choose your form.
- Shortcode: Paste your plugin’s shortcode (example):
[contact-form id="123" title="Contact"]
Step 6 — Accessibility & UX Essentials
- Ensure every field has a visible label; don’t rely on placeholders alone.
- Use clear error messages and indicate errors in text (not color only).
- Keep contrast strong and the hit area of the submit button large.
- Respect motion/animation preferences; avoid excessive effects around the form.
Step 7 — Privacy, Compliance & Data Handling
- Link to your Privacy Policy near the form and add a consent checkbox.
- Only collect necessary fields; avoid sensitive data via simple contact forms.
- Store submissions securely (limit retention if not needed).
Step 8 — Test Thoroughly
- Submit test messages with valid and invalid inputs (to trigger errors).
- Verify confirmation message or thank-you page displays.
- Confirm admin email and user auto-reply are received.
- Test on mobile and desktop. Check keyboard navigation and screen reader basics.
Copy-and-Paste Starter Content (Edit to Fit)
Headline
Let’s Talk
Intro Paragraph
Have a question, project inquiry, or need support? Send us a message using the form below. We typically respond within 1 business day.
Contact Form
[your-form-shortcode]
Alternate Contact
- Email: [email protected]
- Phone: (123) 456-7890
- Hours: Mon–Fri, 9am–5pm
- Address: 123 Main Street, Your City
Map / Service Area (Optional)
Frequently Asked Questions
How quickly will I hear back?
We reply within 1 business day. Urgent? Call us during business hours.
Do you offer free consultations?
Yes—15 minutes to discuss your needs and recommend next steps.
What information should I include?
Tell us what you need, your timeline, and your budget range if possible.
By submitting this form, you agree to our Privacy Policy.
Activity
- Create a contact form with the fields listed above and enable anti-spam.
- Embed the form on a new Contact page using a block or shortcode.
- Configure admin and user email notifications; send and verify a test submission.
Quality Checklist
- Clear headline and response-time promise
- Minimal, necessary form fields with labels
- Spam protection active (honeypot/reCAPTCHA)
- Notifications + auto-reply configured
- Privacy policy link + consent checkbox
- Mobile-friendly layout; keyboard navigable
Troubleshooting
- No notification emails? Use domain email, set SPF/DKIM with your host, and consider an SMTP plugin.
- Form won’t submit? Check required fields, reCAPTCHA keys, and plugin conflicts (temporarily disable other plugins to test).
- Layout issues? Remove extra columns around the form and avoid overly narrow containers.
Next Steps
Add a “Thank You” page with next steps, track submissions as conversions (e.g., with your analytics tool), and consider routing rules for sales vs. support.
